
 Since gvSIG 2.4, the tools for development in the Scripting Module has been increased. One of this tools is an integration with Git. This tools will help to keep a version control of our plugins.
Inside of the gvSIG Association, we use this integration to keep updated and published our plugins that you can check in Github: gvSIGAssociation.
For those who don’t know Github, it’s a platform based on Git to keep a version control of programming developments. It allow us to have an online repository with our code and keep it updated. If you are interested in development and in sharing your project, github is a good place to start. We encourage you to search more info online.
This Git integration is very easy to use from gvSIG. This is a miniguide step by step.
- The functionalities of Git/Github are many and very extensive, this is just an example of clone a repository that it is already online and update it using gvSIG. You have to use a repository that you own to follow this guide.
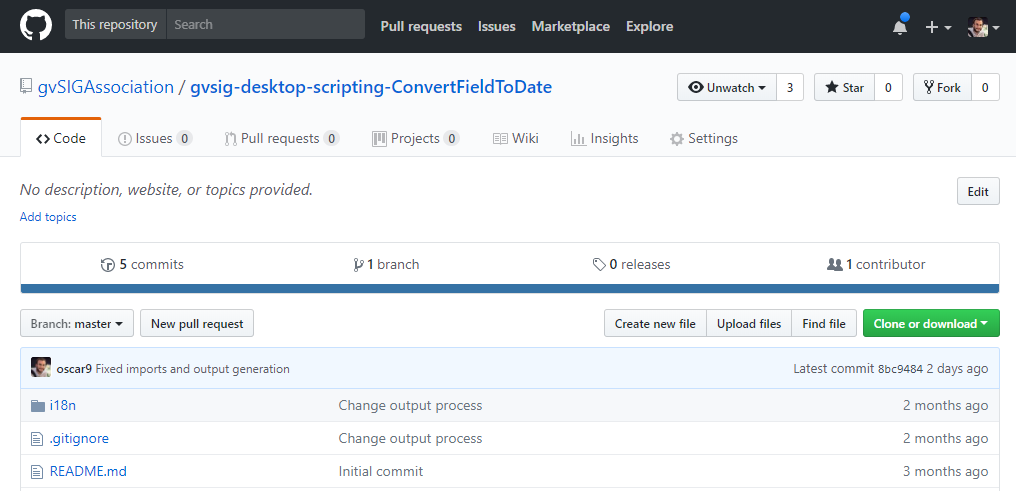
We are going to start with a initialized project like this one in Github: gvsig-desktop-scripting-ConvertFieldToDate
Other developers could have their own repositories, public or private. If you are new in Github or Git, there is a lot of information online.
First step, get the link to the repository. In the project web page, press the green button “Clone or download”
and click over “Copy to clipboard”

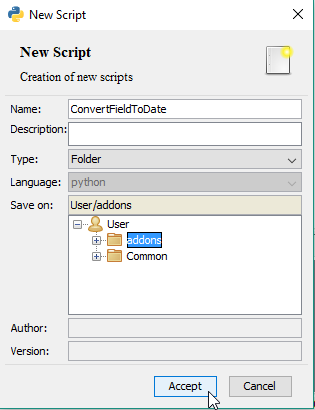
Next step is inside gvSIG. Open the Scripting Composer and create a new empty folder. In this case we are going to create it inside “addons” with the same name as the project: “ConvertFieldToDate”.
In the menu, we will search for Git module.
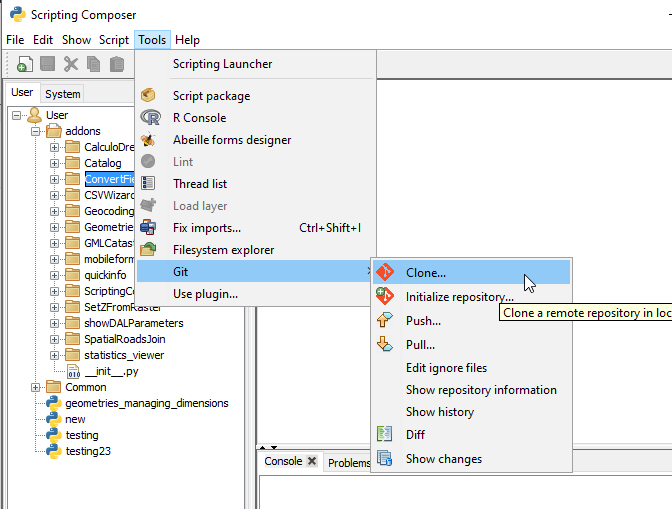
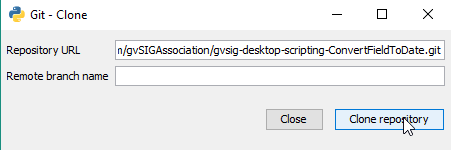
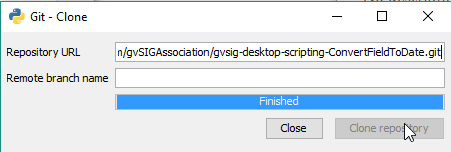
To start, we are going to clone the files that are in the cloud to start working with them. Select “Clone” and paste the link to the repository from the previous step. Be sure the project is selected in the Tree projects folder.
After:
If we check the project folder, we’ll see that is still empty, but we already created a “link” between this folder and Git.
- Check again if your project folder is selected
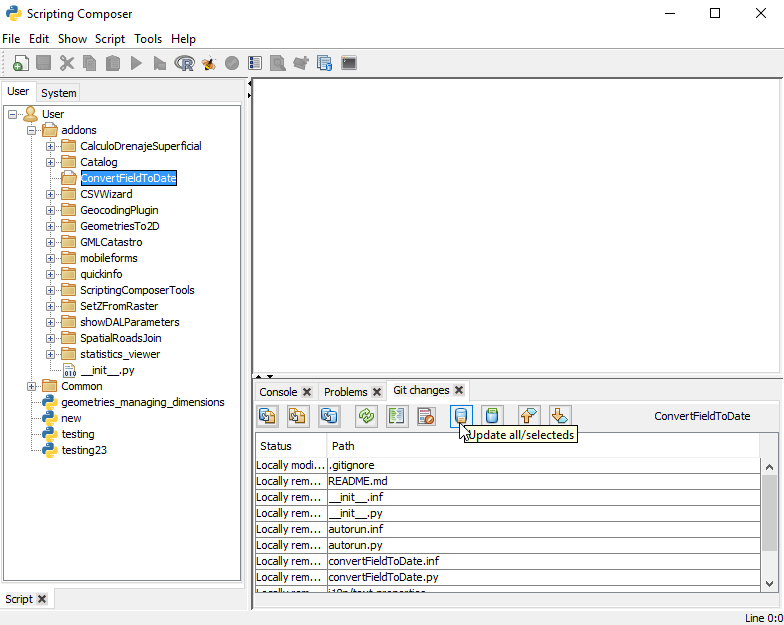
The majority part of the options appears in Git -> Show Changes

A new tab will be oppened down. It will show the differences between the local repository and the online repository, also a bunch of icons with other options.

We want to match the local repository with the online repository so we will click on “Update all” and then press “Yes”. Be careful, if any file is contained in this folder and it’s different from the online repository, it will be deleted.
Once this operation is concluded, refresh the tree project:

We will see that there are files inside the folder

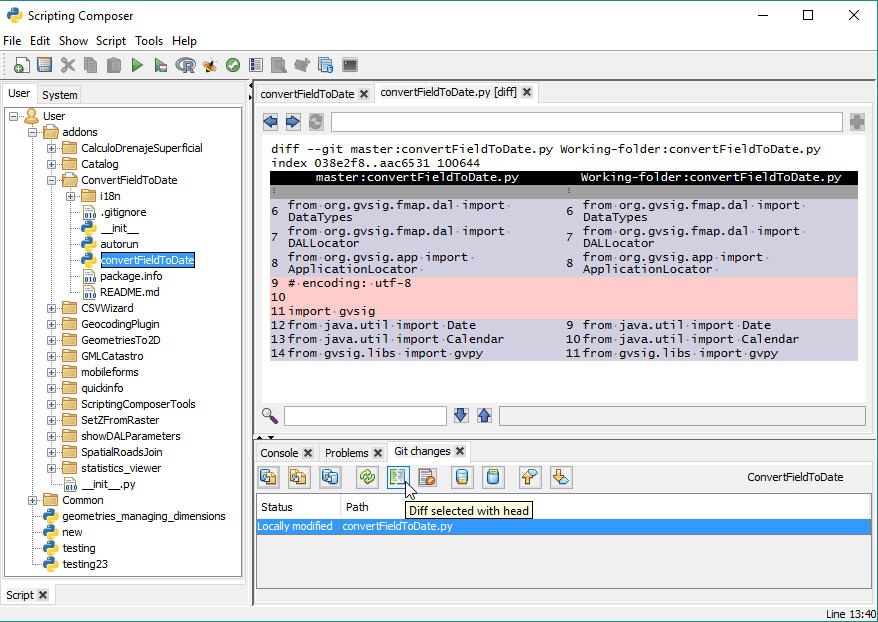
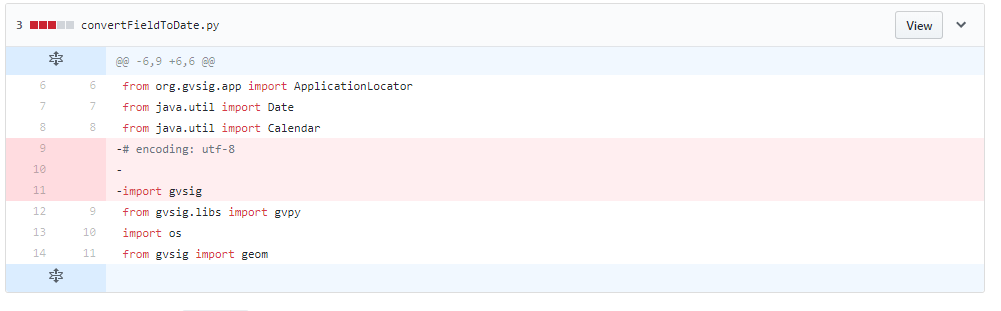
In this example, we are going to fix some code deleting some imports that we don’t already need. Change the lines in “convertFieldToDate” and save the script.
Once this is done, press the refresh button down

The changes will be show in the list.

If we select one of this changes and press the button “Diff selected with head”, we can see the changes between the local file and the file in the repository. In this case, we have deleted two lines (in red).
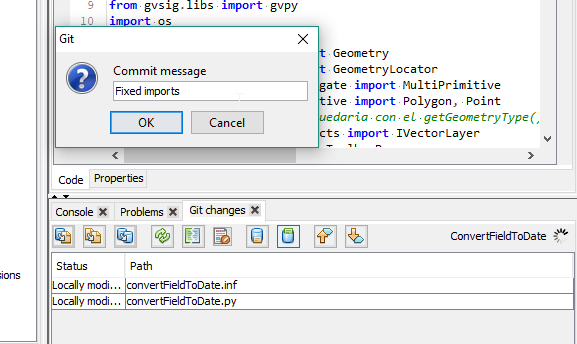
To update the online repository, first we have to commit them. We can select witch file to commit or commit all.

Write a description of the bug fixed:
Once the commit is done, search for the push button for upload the code to Github.
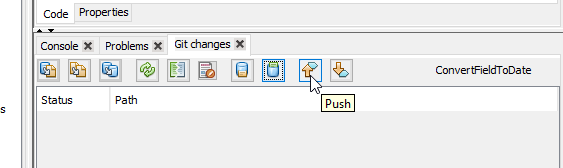
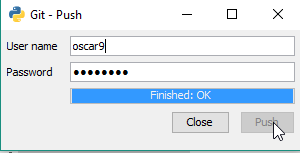
An user and password will be asked.

Once it’s finished, it will show “OK”.
In the website we could check if the commit has been done.

And also check for the changes:
 This is a brief guide to Git integration in gvSIG.
If you have any question ask in Mailing lists.


Pingback: Scripting in gvSIG: Git integration – GeoNe.ws