
We are going to dedicate this last post to the “Add-ons manager”, a tool that every gvSIG Desktop user should know.
The add-ons manager is a tool that allows to customize gvSIG, installing new extensions, functional ones as well as other types (symbol libraries). It can be run from the “Tools/Add-ons manager” menu, although it can be accessed during the installing process.
Thanks to the “Add-ons manager” you can access to the plugins not installed by default as well as to the new tools that are published after a final version.
At the window that appears firstly you have to select the add-ons installation source:
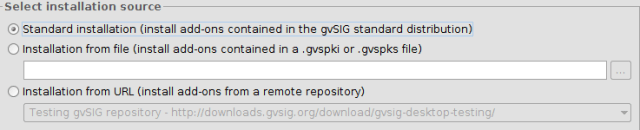
The add-ons can have 3 sources:
-
The own installation binary. The file that we have downloaded has a lot of plugins and add-ons, and some of them are not installed by default, but they are available to install. It allows to customize gvSIG without an internet connection.
-
Installation from file. We can have a file with a set of extensions to be installed on gvSIG.
-
From URL. Through an internet connection we can access to all the add-ons available at the gvSIG server and install those that we need. It’s the recommended option when we want to consult all the add-ons available.
Once the installation source is selected you have to press “Next”, and it will show the list of plugins available.
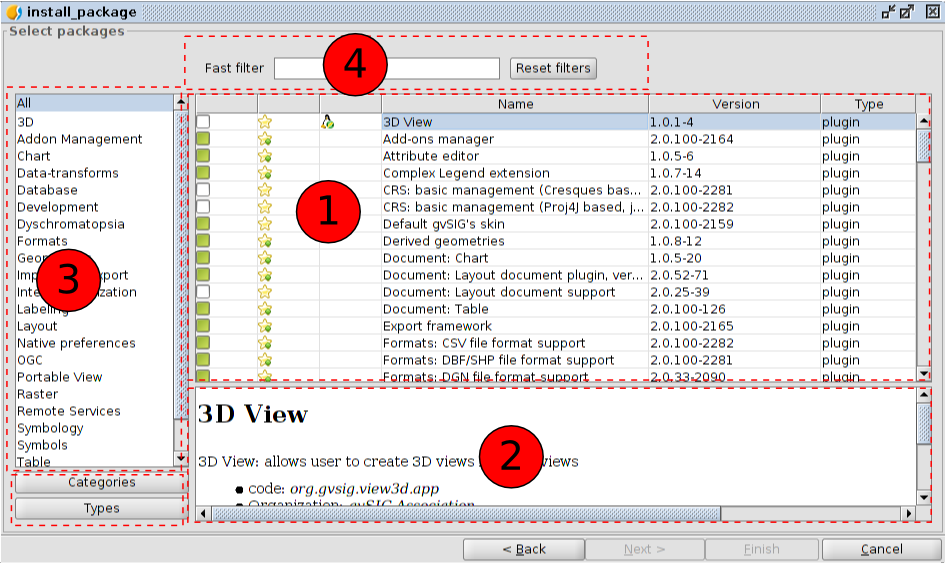
The add-ons manager interface is divided in 4 parts:
-
List of available add-ons. The plug-in name, version, and type are indicated. The verifcation check boxes allow to distiguish between available (white) or already installed add-ons (green). You also can see the meaning of the icons.
-
Information area concerning the plug-in selected in “1”.
-
Area that shows the “Categories” and “Types” in which the plug-in is classified. When we choose a category or type from the list, a filter that runs on “1” shows only the plug-ins related to this category or type.
-
Fast filter. Enables a filter from a text string entered by the user.
In our case we are going to install a new symbol library. For that we will select “Symbols” category, that will filter by “symbol libraries” plugins:
Now we will mark “G-Maps” library:
 Then we press “Next” button and once it’s installed we press “Finish”. A message will indicate that we have to restart gvSIG, but it’s not necessary for symbol libraries. We would have to do it for functional plugins only.
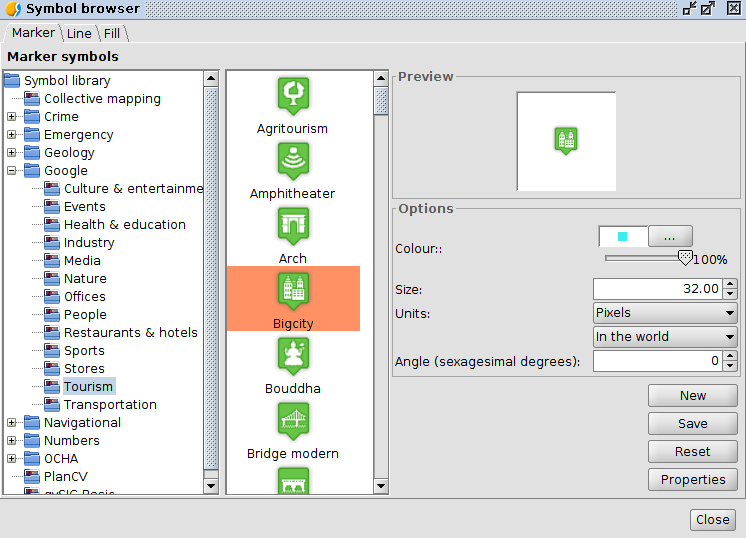 Now, if we are going to change the symbology of any of our layers, for example “Locations”, we will see that we have the new symbols available:
You can see the symbol libraries available in the gvSIG documentation.
And with this last post we finish this atypical course about introduction to GIS. We expect that you have learnt, and besides it has been as much funny as for us to do it.
From this point you are prepared to go more deeply into the application and discover all its power.
And a last advice… you can use the mailing lists to consult any doubt or tell us any problem that you find:
http://www.gvsig.com/en/community/mailing-lists


