Camino a gvSIG 2.2: Extensión de publicación

Esta extensión se va a convertir en una herramienta imprescindible para los usuarios que necesiten publicar sus mapas utilizando aplicaciones como MapServer, MapProxy y TinyOWS.

Su objetivo es permitir una automatización del proceso de publicación de servicios de mapas, intentando obtener unos resultados lo más fieles posibles al trabajo original que tengamos en nuestro gvSIG 2.1.

La extensión se puede encontrar con el nombre de ‘org.gvsig.publish‘, pudiéndose instalar a través del ‘Administrador de complementos’, seleccionando la instalación desde URL y en el desplegable el repositorio de testing (Testing gvSIG repository – http://downloads.gvsig.org/download/gvsig-desktop-testing/).

Una vez instalado tendremos acceso a la funcionalidad de publicación bien a través del menú Vista>Exportar>Exportar vista a mapfile, bien a través del botón correspondiente.

Veamos, a modo de guía rápida, el funcionamiento de esta aplicación:

Selección del directorio local de trabajo

Con el fin de poder operar más cómodamente, la extensión requiere que se defina una carpeta local en el equipo para poder almacenar y crear toda la estructura del proyecto.

Se puede tratar de un directorio nuevo (que creará si no existe), vacío o uno sobre el que ya se ha trabajado previamente (para poder unir varios trabajos en un único proyecto).

Opciones avanzadas: Selección de servicios

Si activamos la casilla de ‘Opciones avanzadas’ podremos acceder a los servicios disponibles a través de la pestaña ‘Servicio’. En ella se podrán marcar tantos como sean necesarios, realizándose la publicación de una sola vez.

Cada servicio generará una subcarpeta con su nombre en el directorio del proyecto, dentro de la cual se generarán los ficheros necesarios para el funcionamiento ese servicio concreto.

Además, en ese mismo formulario se nos ofrece la posibilidad de indicar el nombre con el que se mostrará el servicio a los clientes y la descripción del mismo.

01_gvSIG_Publish

Creación del proyecto

Si el directorio destino donde se va a almacenar el proyecto en el equipo local no está vacío, la aplicación preguntará la opción a escoger, a elegir entre sobreescribir, añadir o cancelar.

  • Sobreescribir: creará todos los ficheros necesarios para el proyecto, pudiendo cambiar el contenido de los ficheros anteriores si así fuera requerido.

  • Añadir: si se quiere añadir más información a un proyecto ya existente, sin perder la información previa.

Esto para empezar, en siguientes post veremos las posibilidades que nos da este plugin para edición manual de atributos específicos y subida del proyecto al servidor. Por no hablar de las posibilidades de su combinación con otro plugin que esperamos liberar pronto que permite generar leyendas y etiquetado por escalas…

Posted in gvSIG Desktop, spanish, testing | Tagged , , , , | 11 Comments

Añadir una página de propiedades al diálogo de propiedades de la Vista en gvSIG 2.1

Hola a todos…
Aquí estoy de nuevo para contaros alguna cosilla mas.

Un compañero me ha preguntado cómo podía hacer para añadir una pestaña a la ventana de propiedades de la Vista. Pues bien, es bastante sencillo. En gvSIG Desktop hay un mecanismo que nos permite añadir fácilmente pestañas al cuadro de diálogo de propiedades de la vista, tabla, capa o el proyecto. Para todos estos cuadros de diálogo se usa el mismo mecanismo.

Tenemos que implementar dos interfaces, por ejemplo:

  • MyViewPropertiesPage, que sería nuestra página a añadir a las
    propiedades de la Vista.
  • MyViewPropertiesPageFactory, que sería la factoría que construye nuestras páginas de propiedades.

Y registrar nuestra factoría en el PropertiesPageManager .

Vamos a ver como quedarían estas clases:

public static class MyViewPropertiesPage implements PropertiesPage {
    
    private JPanel panel = null;
    private ViewDocument viewDocument = null;

    public MyViewPropertiesPage(ViewDocument viewDocument) {
      this.viewDocument = viewDocument;
      this.panel = createPanel();
    }
    
    public String getTitle() {
      // label of the tab.
      I18nManager i18nManager = ToolsLocator.getI18nManager();
      return i18nManager.getTranslation("My properties");
    }

    public int getPriority() {
      // Position of tab, when less the tab is rightmost
      return 10;
    }

    public boolean whenAccept() {
      // Get values from panel and apply to the viewDocument
      return true;
    }

    public boolean whenApply() {
      // Get values from panel and apply to the viewDocument
      return true;
    }

    public boolean whenCancel() {
      return true;
    }

    public JComponent asJComponent() {
      return this.panel;
    }

    private JPanel createPanel() {
      JPanel p = new JPanel();
      // Add the conponents to the panel
      p.setLayout(new BorderLayout());
      p.add(new JLabel("Demmo"),BorderLayout.CENTER);
      return p;
    }
    
}

Con esto definiríamos nuestra página de propiedades, y ahora veamos como podría ser la factoría:

public class MyViewPropertiesPageFactory implements PropertiesPageFactory {

    public String getGroupID() {
      return ViewDocument.VIEW_PROPERTIES_PAGE_GROUP;
    }

    public boolean isVisible(Object obj) {
      return true;
    }

    public PropertiesPage create(Object obj) {
      return new MyViewPropertiesPage((ViewDocument) obj);
    }

}

En la factoría, hay que tener especial interés en:

  • El valor de retorno de getGroupID debe corresponderse con el diálogo al que queremos añadir nuestra pagina de propiedades.  Si retorna ViewDocument.VIEW_PROPERTIES_PAGE_GROUP, se añadirá al diálogo de propiedades de la Vista, pero si, por ejemplo,  quisiésemos añadir nuestra página al diálogo de propiedades del proyecto retornaríamos Project.PROJECT_PROPERTIES_PAGE_GROUP.
  • El método isVisible recibe, en nuestro caso, la Vista que está asociada al diálogo de propiedades, y devolbera true si  se debe mostrar esta página para ese documento Vista. Si estuviésemos añadiendo la página a las propiedades del proyecto recibiríamos un objeto de tipo Project.
  • El método create, recibirá el objeto ViewDocument asociado al diálogo.Si ya tenemos estas dos clases listas, solo nos faltara registrar nuestra factoría:
PropertiesPageManager manager = MapControlLocator.getPropertiesPageManager();
manager.registerFactory(new MyViewPropertiesPageFactory());

El resultado de este código seria algo como:

general myproperties

Un saludo a todos!

Posted in development, gvSIG Association, gvSIG Desktop, gvSIG development, spanish | 1 Comment

Camino a gvSIG 2.2

roadTras la publicación de gvSIG 2.1, comenzamos el camino hacia gvSIG 2.2, para lo que os pedimos vuestra máxima colaboración, tanto en testeo como en cualquier aporte que podáis realizar, ya sea técnico o económico.

Estábamos esperando la publicación de gvSIG 2.1 para establecer un calendario de publicación de gvSIG regular, que ya ponemos en marcha. Nuestra intención, emulando a proyectos como Ubuntu, es publicar dos versiones al año, una entorno al mes de mayo y otra en diciembre, coincidiendo con la realización de las Jornadas Internacionales de gvSIG.

De este modo tanto los equipos de desarrollo como las distintas organizaciones que utilizan gvSIG, podrán planificar sus tareas tanto de envío de contribuciones técnicas como de actualización de versiones.

Por tanto, gvSIG 2.2 debería estar disponible en mayo.

¿Qué tenemos planificado para este versión? A nivel de la comunidad de desarrolladores no habrá grandes cambios en el core, siendo una versión que permita continuar depurando de bugs gvSIG y añada las nuevas extensiones que estamos terminando de desarrollar.

En las próximas semanas iremos liberando extensiones candidatas a formar parte de la próxima versión de gvSIG para que nos ayudéis a testearlas (y podáis ir utilizando sobre gvSIG 2.1). Atentos a los anuncios que hagamos, que vienen novedades muy interesantes.

Posted in gvSIG Desktop, spanish, technical collaborations, testing | Tagged , | 5 Comments

gvSIG 2.1: Military symbology

Another of the (many) new features which can be found in the new gvSIG version is the library called “Military-APP6” with the symbol library being defined by the standard establishing the rules and requirements to develop and display joint military operational symbology within the Defense Sector. This is the biggest symbol library available in gvSIG and for sure, all the users not related to the defense sector will be surprised with the great number of symbols for military cartography, to represent any type of elements.

To create this symbol library, the document ”Commented APP-6A – Military symbols for land based systems. Defense Research and Development Canada – Valcartier. Techical Notel DRDC Valcartier TN 2005-222. “ has been used as reference.

To install it, as usual, we will use the “Add-ons manager”.

In order to make easier the search of symbols, a classification in 4 groups has been made: equipment & weapons; operations other than war; units; size units. Also, the two first groups have been divided in new subgroups.

Each symbol related to the units, it can be multiply according to the unity size. The units are represented by small top marks in each symbol. So, each unit symbol should be replicated a dozen times to represent all the possible unit sizes….that is something that can make harder to use it, because the need to browse between hundreds of “similar” symbols.

To overcome this military symbology difficulty, the folder “Size Units” has been created. gvSIG 2.1 allows at any moment, to join 2 or more symbols to represent one new symbol. This way, the user who needs it, can use a combined symbol created from “Units” and other from “Size Units”. The new symbol can be used and saved as combined symbol.

Posted in community, development, english, gvSIG Desktop | Tagged , , | 1 Comment

gvSIG 2.1: Transportation symbol library (AIGA)

In gvSIG 2.1 we can install (among the available symbol libraries) the library called AIGA. AIGA is the acronym for American Institute of Graphic Arts.

AIGA is known for its activities related to technical design, in particular with the creation of pictograms for the United States Department of Transportation in 1979. We have created the new symbol library based on this pictogram group.

The dot symbols have been complemented with symbols for lines or fills inspired by the colour palette used in the document “Thinking inside the box. AIGA identity and branding guidelines“.

To install it, as usual, we should use the gvSIG add-ons manager.

Once installed, we can use symbols as the following ones:

AIGA_gvSIG

Posted in english, gvSIG Association, gvSIG Desktop | Tagged , , , , | 2 Comments

Articles, books, papers, university research… knowledge database of the website of gvSIG

Taking advantage of the new gvSIG 2.1 version, we have launched a new website that integrates the project website and the gvSIG Association one. This fact allows a single point of entry for technical and organizational information concerning the gvSIG project, and for professional services.
This new website is going to be completed and updated in the coming months with some sections that remain to integrate, mainly development and user documentation of gvSIG Desktop. Besides we are going to expand the contents related to the products of gvSIG catalog, which it has recently joined gvNIX and, soon, we will incorporate new sectorial solutions like gvSIG Roads.
However in this post I want to talk about one of the (many) sections that the new website has and how it is related to popularization. This section is:
To popularize gvSIG is a task for the whole Community. gvSIG appears in magazines, books … we will collect this material and make it available to the entire community. “
So this is the task; we have to collect all scientific and technical articles, presentations, papers to grade, masters, dissertations, books, webinars, etc…everything considered of to be interest and related to the use of gvSIG technology. We want to give visibility to the work of the gvSIG Community.
We have included automatic filters for language and year to help us with the ability to search this massive database of knowledge.
We have divided this section in the subsections:

  • Articles: includes publications in scientific and technical work where the use of gvSIG is relevant or articles about gvSIG.
  • Presentations: Presentations related to gvSIG at scientific conferences, technical presentations, etc.
  • Books: Publications with articles focused on gvSIG
  • Campus: related to academia, like dissertations, master’s degree projects.
  • Open Planet: Magazine of gvSIG.
  • Educational material: documentation of courses, seminars, workshops … available to facilitate self-teaching.

This database is not complete … because every month new materials are published and it is impossible to identify all of them. So if you see anything missing and consider it to be of interest, please send us the information and we will add this new content.

Posted in community, english | Tagged , , , , | Comments Off on Articles, books, papers, university research… knowledge database of the website of gvSIG

gvSIG 2.1 is here!

The gvSIG Association announces the publishing of the gvSIG 2.1 final version. This version, that is the first one based on the new architecture orientated to users, has a lot of new features as you can see now. Besides the new functionalities and the correction of a great number of errors that have been detected thanks to the community collaboration, we want to highlight the availability of a distribution for Linux 64 bits and portable versions for Windows as well as for Linux.

Together with the gvSIG 2.1 releasing we publish the new gvSIG website, that includes the old gvSIG Association website as well as the project one, and at the same time a knowledge portal about the gvSIG technology. Besides this new website will be to make the new products of the gvSIG catalog visible, like gvSIG Roads or gvNIX.

We want to take advantage of this announcement to thank all the people that have collaborated in making this new version reality, and all the entities that have counted on the gvSIG Association services to solve their needs on geomatics, helping to guarantee the sustainability of the project at this way.

We hope you enjoy all the novelties of this version, that are here.

We hope 2015 is a year with a lot of novelties, where gvSIG 2.1 and the new website are the first of them. Be aware of them!

My idea of this post is to go a little bit further than just telling you about new features. I will add some visual information and links for knowing more about this new improved version. Let´s go….

Georeferencing. It is possible to put a reference system (geographical coordinates) to a digital image with pixel coordinates (rows and columns)  01
 02 Principal components. The analysis of principal components is a multispectral conversion, aiming to avoid the use of redundant information in the sidelines of the image. The technique allows to convert a sideline series in new variables called correlated components, that absorb almost all the variability of the data in a subgroup of the initial bands. The advantage is that most of the information is at the first three bands that have been created, that allow to keep almost all the information with less space.
Tasseled-cap. The transformation tasseled cap is a conversion more general than the one with principal components, having as well indexes with a concrete physical meaning. So, it´s possible to determine the brightness value, the greenish and the humidity of the soil. The transformation Tasseled is focused on pointing the relevant spectral characteristics the vegetable areas during its development, to be able to take out specific crops and other crops of other vegetable surfaces using the spectrals ranks of the Landsat multitemporal images.  03
 04 Masks by regions of interest. With this functionality, from a previously selected area is possible to make it visible and to have a fixed value assigned by the user on the external side of the interest area or vice versa.
Set projection. Set projection to a raster layer of the View.
 05 Change data type. It allows to change data of a raster image
Create multi-file layers. It allows to add more image bands from other files and create new multi-file layers.  06
 07 PostGIS raster support. It allows to load in gvSIG, raster layers saved in a PostGIS database. These raster layers will be added to the gvSIG Views and they would be used as local raster layers.
Expressions legend. It allows to create legends representing the data linked to a concrete expression defined by the user. This link is about new legend types in gvSIG 2.1: https://blog.gvsig.org/2014/12/02/gvsig-2-1-a-full-set-of-legends/  08
 09 Proportional symbols legends. It allows to create legends using the size of a symbol to represent the different values of the layer´s numerical attributes. The size of each symbol show the real value of the data
Graduate symbols legends. It allows to create legends using the symbols size for showing different value ranks. The quantitative values will be classified in ranks with minimum and maximum values. In each rank, all the entities will have the same symbol.  10
 11 Dot density legend. It allows to create legends by dot density for layers with numerical attributes.This type of legend show the quantity of an attribute in a selected area. Each dot represents a specific number of entities.
Quantities by category legend. It allows to create legends combining two types of legends in only one: graduate symbols and intervals.  12
 13 Bars legend. It allows to create bars legends for obtaining numeric attributes of the elements of one layer.
Pies legend. It allows to create pie legends for obtaining numeric attributes of the elements of one layer.  14
 15 New layout with TOC (table of contents) included.(Layout). In gvSIG 2.1 a new document Map has been created with the integration of the layers management (TOC) inside of the maps builder. It is a real improvement in mapping production tasks, because the user will not need to be changing from the document View to Map every time that a new action is required; such as add a new layer, modify the symbology or labelling. https://blog.gvsig.org/2014/11/14/gvsig-2-1-improving-cartographic-production/
New grid functionalities. In the new document Map in gvSIG 2.1, we will find the functionality of create an improved grid and be able to set up all the visual parameters (intervals, labels and symbols). https://blog.gvsig.org/2014/11/17/gvsig-2-1-configuration-of-the-grid-in-the-new-map/  16
 17 Export to KML. It allows to export to KML, with options for exporting balloons and labels.
Advanced labelling. It can be defined by the user, with many more options and more powerful than basic labelling. They are three methods: Only labelling when the entities were selected, defining different entities classes and label them in different way or labelling all the elements in the same way. https://blog.gvsig.org/2015/01/28/advanced-labelling-in-gvsig-2-1/  18
 19 Halo option for labels. It allows to create a halo for the labels, with colour and size defined by the user, improving the visualization of the texts.
Toolbox: Unified geoprocessing manager. All the vector and raster geoprocesses have been integrated in one only, called Toolbox. One of the advantages is to be able to use all the geoprocesses in the modeller.  20
 21 Alphanumeric editor in Views. It allows to edit the attributes of any element in one layer without the need to go to its table.
It works very similar to the “Information” button but in this case, we will be able to edit any of the attributes in our selected element. https://blog.gvsig.org/2014/12/10/gvsig-2-1-alphanumeric-editor-at-the-view/
Dyschromatopsia / colour blindness. From one View with a default legend, we can change it (or create a new one) to one which will be readable by users with any problem related to dyschromatopsia or colour blindness. https://blog.gvsig.org/2015/01/09/gvsig-2-1-dyschromatopsia-colour-blindness-extension/  22
 23 Memory management. RAM Memory management at the Preferences menu https://blog.gvsig.org/2014/11/19/gvsig-2-1-memory-management/
Derived geometries. It allows to create polygon o line layers from a point layer, or a polygon layer form polylines. The user can indicate which elements are part of each polygon or polyline. https://blog.gvsig.org/2014/12/10/gvsig-2-1-derived-geometries/  24
 25 MsExcel format supporting as a table. It allows to add Excel sheets as tables. https://blog.gvsig.org/2014/12/11/gvsig-2-1-from-excel-to-gvsig/
MsExcel format supporting as a layer. It allows to add Excel sheets as layers. For that, we will indicate the columns with the coordinates.
CSV support as Table. It allows to add CSV files as tables.
CSV support as layers. It allows to add CSV files as layers.
 26 Improvements in Table properties. The new properties window allows to the user to have all the information about the characteristics of the columns and be able to modify the representing way of the numeric fields. In addition to that, it allows to select the characteristic “Locale” of the table and to point easily which fields we want them visibles. Inside these fields, the “Geometry” filed has been added containing the coordinates of each geometry.
Table tools interface improved. Some changes have been for improving the user experience, such as adding buttons to work with the columns (add or remove) quickly from one table.
Linux 64bits support. There is a new Linux distribution for 64 bits, along the 32 bits one.
EPSG (projections) database update. The database has been updated with the addition of several new projections number, news for gvSIG.
Dragging layers from the file browser. It allows to drag files to our View from the file browser in our operating system and that gvSIG add them automatically. https://blog.gvsig.org/2014/12/01/gvsig-2-1-dragging-layers-from-the-file-browser/
Import / Export SLD legends. It allows to import/export legends to the SLD standard(Styled Layer Descriptor).
Field calculator new features. New features have been added, such as the function which permits to use the brackets in the expressions when they are not being used to indicate a field. For instance, “ [CAMPO1][:10]” would give us the 10 first attribute values . Some gvSIG 1.x features (rec, area or permiter) have been migrated..
New interfaces (create layer, export layer, info…..). The new interfaces have more options to create layers, export layers or ask for information of one element.  27
Scripting: raster data support. The raster data support has been included in scripting.
PostGIS connections and support. The tools related to PostGIS databases have been improved.
 28 POI Cities symbol library. An urban points of interest library has been added. https://blog.gvsig.org/2015/01/08/gvsig-2-1-symbol-library-of-urban-interest-points/
Geology symbol library. A Geology symbol library has been added, including a group of geological symbols in folders and subfolders (bedding, cleavage, eolian, fluvial/alluvial, foliation, geohydrology…) and a group of fill symbols with the RGB colour codes defined by the CGMW (Commission for the Geological Map of the World) representing the different stratigraphical unities. https://blog.gvsig.org/2014/12/09/gvsig-2-1-symbol-library-of-geology-2/  29
 30 Commerce symbol library. It contains a group of symbols related to business and commerce.
Military symbol library. A group of military symbols has been added defined by the standard APP6https://blog.gvsig.org/2015/02/13/gvsig-2-1-military-simbology/  31
 32 Collective Mapping symbol library. Symbol group orientated to the needs of social groups, to the collective mapping jobs and to analyse our social reality. https://blog.gvsig.org/2015/01/29/gvsig-2-1-symbol-library-for-collective-mapping/
Colors symbol library. It has different color scales to represent any kind of data.  33
 34 AIGA symbol library. It contains the symbols designed by the American Institute of Graphic Arts para transport.https://blog.gvsig.org/2015/02/12/gvsig-2-1-transportation-symbol-library-aiga/
Weather symbol library. Symbology to make climate maps according to the standard defined by the World Meteorological Organization.https://blog.gvsig.org/2015/02/02/gvsig-2-1-symbol-libray-for-climatology/  35

We hope you enjoy all the novelties of this version, that are here.

We hope 2015 is a year with a lot of novelties, where gvSIG 2.1 and the new website are the first of them. Be aware of them!

Posted in english, gvSIG Desktop, opinion | Tagged , , | 6 Comments

gvSIG 2.1: Simbología militar

Dentro de las (numerosas) novedades que trae la última versión del SIG libre gvSIG se ha incluido la biblioteca denominada “Military-APP6” que contiene el conjunto de símbolos puntuales que constituyen el estándar utilizado para la representación cartográfica de cualquier actividad relacionada con el sector de la defensa. Esta es la biblioteca de símbolos más extensa de las disponibles en gvSIG, y seguro que todos aquellos ajenos al sector defensa se sorprenderán con las decenas de símbolos cartográficos existentes para representar todo tipo de elementos.

Para la realización de esta biblioteca de símbolos se ha utilizado como referencia el documento ”Commented APP-6A – Military symbols for land based systems. Defense Research and Development Canada – Valcartier. Techical Notel DRDC Valcartier TN 2005-222. “.

Para su instalación, como con cualquier complemento, utilizaremos el “Administrador de complementos”.

Para facilitar la búsqueda de símbolos se ha realizado una clasificación en cuatro grupos: equipment & weapons; operations other than war; units; size units. Dividiendo a su vez los 2 primeros grupos en nuevos subgrupos.

Cada uno de los símbolos relativos al tipo de unidades, a su vez, se puede multiplicar en función del tamaño de la unidad. Las unidades se representan con unas pequeñas marcas superiores que acompañarían a cada símbolo. Por tanto, cada símbolo de unidad debería estar replicado una docena de veces para representar todos los tamaños de unidad posible…algo que podría aumentar la complejidad del usuario al tener que navegar entre cientos de símbolos “similares”.

Para solventar esta característica de la simbología militar se ha creado la carpeta “Size Units”. gvSIG 2.1 permite en cualquier momento unir 2 o más símbolos para representar un nuevo símbolo. Así, el usuario que necesite, en cualquier momento puede utilizar un símbolo que sea la combinación de un símbolo de “Units” y otro de “Size Units”. Puede utilizarlo y además tiene la posibilidad de guardarlo como símbolo combinado.

Posted in gvSIG Desktop, spanish | Tagged , , | Leave a comment

Como gestionar las preferencias de un plugin en gvSIG 2.1

Hola ,

Un desarrollador ha preguntado en la lista de desarrollo de gvSIG cómo se podía añadir una entrada nueva al diálogo de preferencias de gvSIG para gestionar las preferencias de un plugin.

Voy a contar muy deprisa como se podría hacer eso, junto con cómo y dónde se almacenarían esas preferencias.

Empezare por donde deberían almacenarse las preferencias de un plugin. Si tenemos instalado gvSIG 2.1.0 y echamos un vistazo a la carpeta gvSIG de nuestro “HOME”, veremos que allí tenemos una carpeta “plugins”, y dentro una carpeta por cada plugin. No habrá una para cada plugin de gvSIG pero si tendremos una por cada plugin que precise de almacenar preferencias o información que deba actualizarse durante la ejecución de gvSIG. Miremos dentro de la carpeta:

gvSIG/plugins/org.gvsig.coreplugin.app.mainplugin/

de nuestro “HOME”.

Allí encontraremos el fichero “plugin-persistence.dat”. Ahí es donde cada plugin almacena sus datos relacionados con preferencias. El formato de este fichero es similar al de los ficheros de proyecto de gvSIG (.gvsproj), pero almacena otro tipo de información, siendo esta particular de cada plugin.

Si borramos estos ficheros perderemos nuestros valores de preferencias y se inicializaran con los valores por defecto que estén en código. Este fichero va a la par junto con otro que se encuentra en la carpeta del plugin. Echemos un vistazo a la carpeta:

gvSIG/extensiones/org.gvsig.coreplugin.app.mainplugin/

…de nuestra instalación de gvSIG. Allí encontraremos, entre otras cosas, un fichero “plugin-persistence.def” con la definición del fichero “plugin-persistence.dat” almacenado en “HOME/gvSIG…”. Por ejemplo en el caso de “org.gvsig.coreplugin.app.mainplugin”, tendremos algo como:

<?xml version="1.0"?>
<definitions>
  <version>1.0.0</version>
  <classes>
    <class name="org.gvsig.coreplugin.app.mainplugin">
      <description>Persistence for the core plugin</description>
      <fields>

        <field name="showNotificationsInConsole" type="Boolean" defaultValue="false" mandatory="false">
          <description></description>
        </field>        
        <field name="showNotificationsInStatusbar" type="Boolean" defaultValue="true" mandatory="false">
          <description></description>
        </field>
        
      </fields>
    </class>
  </classes>
</definitions>  

En el que se define que en las preferencias del plugin habrán dos propiedades de tipo “booleano“, “showNotificationsInConsole” y “showNotificationsInStatusbar” cuyos valores por defecto son “false” y “true” respectivamente.

El primer paso para gestionar las preferencias de nuestro plugin sería crear este fichero con la definición de los atributos que queramos persistir en nuestras preferencias. Para valores “simples“, String, Integer, Double, Boolean… es muy simple su definición, pero también podemos almacenar estructuras de datos mas complejas como “List“, “Map” o “Set“, y si lo precisamos definir nuestras propias estructuras. De momento, creo que para los tipos “simples” bastara con que le echéis un vistazo a los ficheros “plugin-persistence.def” que podéis encontrar en la instalación de gvSIG, y si tenéis alguna duda preguntar por las lista de desarrollo. Si tengo un rato, y creéis que es interesante, ya prepararé un articulo comentando en profundidad todas las posibilidades que tenemos para definir nuestros datos de preferencias en este fichero.

Ah!, una cosa importante… es crítico que donde “<class name=” diga exactamente el nombre de nuestro plugin, si no no cargara esta definición asociada a el.

Bien, voy a asumir que ya habéis creado vuestro fichero “plugin-persistence.def”, y lo tenéis preparado para que se despliegue en la carpeta de la instalación de vuestro plugin. ¿ Y ahora qué hago con él ?

La cosa es muy simple. Veamos una lineas de cogido:

PluginsManager pluginsManager = PluginsLocator.getManager();
PluginServices plugin = pluginsManager.getPlugin(MyClaseExtension.class);
DynObject pluginProperties = plugin.getPluginProperties();

Con estas tres lineas forzaríamos a que se cargase el fichero “plugin-persistence.dat”, si existe, y si no existe se crearía una “estructura” vacía con la definición del  “plugin-persistence.def” y nos la dejaría en “pluginProperties” para poder acceder a ella. Podríamos hacer:

  Boolean showNotificationsInStatusbar = (Boolean) pluginProperties.getDynValue("showNotificationsInStatusbar")

Para acceder a la propiedad “showNotificationsInStatusbar” de nuestro fichero de preferencias. O si quisiésemos podríamos hacer:

  pluginProperties.setDynValue("showNotificationsInStatusbar", Boolean.TRUE);

Si quisiésemos asignarle un valor a esa propiedad de nuestras preferencias. En caso de que modifiquemos los valores de las preferencias, podemos forzar a guardarlas en ese momento con:

  pluginProperties.savePluginProperties()

O simplemente al cerrarse gvSIG estas se guardaran automáticamente.

Bueno… así sería en plan muy rápido como se guardan o recuperan las preferencias de nuestro plugin. Ahora queda ver cómo podemos añadir al diálogo de preferencias de la aplicación una nueva entrada para gestionar dichas preferencias.

Para crear una entrada en las preferencias de gvSIG tendremos que crear una clase que extienda de “AbstractPreferencePage” y rellenar algunos métodos:

public class MyreferencesPage extends AbstractPreferencePage {

    private static final Logger logger = LoggerFactory.getLogger(MyPreferencesPage.class);
    
    public static final String ID = MyreferencesPage.class.getName();
    
    private MyPreferencesPanel preferences;
    private DynObject pluginProperties;
    private PluginServices plugin;

    public MyPreferencesPage() {
        initComponents();
    }

    private void initComponents() {
        I18nManager i18nManager = ToolsLocator.getI18nManager();
        PluginsManager pluginManager = PluginsLocator.getManager();
        this.plugin = pluginManager.getPlugin(this);
        this.pluginProperties = this.plugin.getPluginProperties();
        
        this.preferences = new MyPreferencesPanel();
        ...

        this.setLayout(new BorderLayout());
        this.add(this.preferences, BorderLayout.NORTH);
        initializeValues();
    }

    public void storeValues() throws StoreException {
    // Recogemos los valores de nuestro panel y los
    // guardamos en "pluginProperties"
    ...
        this.plugin.savePluginProperties();
    }

    public void setChangesApplied() {

    }

    public String getID() {
        return ID;
    }

    public String getTitle() {
        I18nManager i18nManager = ToolsLocator.getI18nManager();
        return i18nManager.getTranslation("Titulo de nuestro pagina");

    }

    public JPanel getPanel() {
        return this;
    }

    public void initializeValues() {
    // Cargamos nuestro valores almacenados en las preferencias,
    // "pluginProperties", en los controles del interfaze de usuario
    
    ...
    Boolean showNotificationsInStatusbar = (Boolean) pluginProperties.getDynValue("showNotificationsInStatusbar");
    ...setSelected(showNotificationsInStatusbar.booleanValue());
    ...
    }
    
    public void initializeDefaults() {

    }

    public ImageIcon getIcon() {
        return IconThemeHelper.getImageIcon("my-preferences");
    }

    public boolean isValueChanged() {
      // Si el usuario ha cambiado algun valor de nuestra pagina
      // retornaremos "true" para forzar a que se recuperen estos y
      // se guarden. Si no retornaremos false
      
      boolean changed = false;
      
      ...
      
      return changed;
    }

    public boolean isResizeable() {
      // Lo normal es que este metodo retorne siempre true.
      // Indica que nuestro panel se colacara en el dialogo usando un
      // layout que lo resizee segun sea necesario.
      return true;
    }

    
}

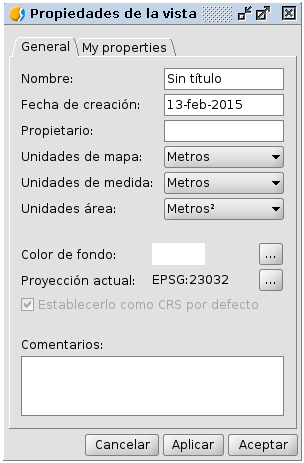
Si quisiésemos que nuestra pagina de preferencias estuviese “bajo” otra en el árbol que aparece en el dialogo de preferencias, no tendríamos mas que añadir en el constructor de nuestra clase una llamada a “setParentID” indicando el identificador de la pagina bajo la que queremos que este la nuestra. Por ejemplo:

    public MyPreferencesPage() {
    setParentID(GeneralPage.id);
        initComponents();
    }

Nos la situaría bajo la entrada “General” del dialogo de preferencias.

Cuando tengamos nuestra clase creada, ya solo es restara registrarla para que gvSIG sea consciente de ella y la presente. Para ello, en el método “initialize” de nuestra extensión usaremos algo parecido a estas lineas de código:

ExtensionPointManager extensionPoints =ToolsLocator.getExtensionPointManager();
ExtensionPoint ep = extensionPoints.add("AplicationPreferences", "");
ep.append("MyPage", "", new MyPreferencesPage());

Y ya solo restara compilarlo todo y ver que pasa.
Espero que os haya servido 😉

Hasta otra!
Joaquin

Posted in development, gvSIG Desktop, gvSIG development, spanish | 1 Comment

Artículos, libros, ponencias, trabajos universitarios…base de datos de conocimiento en la web de gvSIG

Aprovechando la salida de la nueva versión gvSIG 2.1, hemos lanzado una nueva web que integra la web del proyecto y la de la Asociación gvSIG, y permite tener en un único punto de entrada toda la información relativa al proyecto gvSIG, tanto técnica y organizativa, como de prestación de servicios profesionales.

Esta nueva web la iremos completando y actualizando en los próximos meses con algunos apartados que todavía quedan pendientes de migrar, principalmente los relativos a documentación de desarrollo y usuario de gvSIG Desktop, además de ir ampliando los contenidos relacionados con los distintos productos que componen el catálogo gvSIG, a los que se ha sumado recientemente gvNIX y, esperamos que en breve, se sumen soluciones sectoriales como gvSIG Roads.

Pero en este post quiero hablar de uno de los (muchos) apartados que tiene la nueva web y es el relativo a divulgación. Este apartado se presenta así:

Divulgar gvSIG es una tarea de toda la Comunidad. gvSIG aparece continuamente en revistas, libros…recopilamos este material y lo ponemos a disposición de toda la Comunidad.

Y precisamente de eso se trata, de ir recopilando todos los artículos científico-técnicos, las presentaciones, los trabajos fin de grado, fin de maestría, tesinas, libros, webinars, etc. que consideramos de interés y relacionados con el uso de la tecnología gvSIG. Un trabajo de la Comunidad gvSIG al que queremos dar visibilidad.

Para facilitar la consulta de esta ingente base de datos de conocimiento hemos incluido filtros automáticos por idioma y año.

Hemos dividido el apartado de divulgación en una serie de subapartados:

  • Artículos: engloba publicaciones en revistas científico-técnicas relativas a trabajos que bien versan sobre gvSIG o en los que el uso de gvSIG tiene relevancia.
  • Ponencias: presentaciones relacionadas con gvSIG llevadas a cabo en conferencias científicas, charlas técnicas, etc.
  • Libros: publicaciones con artículos centrados en gvSIG.
  • Campus: trabajos relacionados con el mundo universitario, como tesinas, proyectos fin de grado o fin de maestría.
  • Open Planet: revista del proyecto gvSIG.
  • Material didáctico: documentación de cursos, seminarios, talleres…disponible para facilitar el auto-aprendizaje.

Por supuesto que esta base de datos dista  mucho de estar completa…pues cada mes se publican nuevos materiales y es imposible identificar todos ellos. Por eso, si echas algo en falta y lo consideras de interés, no dudes en enviarnos la información y añadiremos esos nuevos contenidos.

Posted in spanish | Tagged , , , , | 6 Comments