How to manage the preferences of a plugin in gvSIG 2.1

English translation of the article by Joaquin del Cerro.

Hi,

A developer has asked in the gvSIG´s development list how he could add a new entry to the “preferences dialog of gvSIG” to manage the preferences of a plugin.

I am going to quickly explain how you could do this, along with where and how these preferences would be stored.

I will begin with where the plugin´s preferences should be stored. If gvSIG 2.1.0 is installed we can have a quick look at the gvSIG folder in “HOME”, where there will be a “plugins” folder, which contains one folder for each plugin. There won´t be one for each GVSIG plugin ,however there will be one folder for each plugin that needs to store preferences or information that must be updated during the running of gvSIG. If we Look inside the folder:

gvSIG/plugins/org.gvsig.coreplugin.app.mainplugin/

of “HOME”.

There we find the “plugin-persistence.dat” file. Ahí es donde cada plugin almacena sus datos relacionados con preferencias. This is the file where each plugin stores its data related to preferences. The format of this file is similar to the project files of gvSIG (.gvsproj), but it stores a different kind of information, and this one is particular for each plugin.

If we erase these files we will lose our preferences and the device will be started with the default values from the code. This file is matched with another that is located in the plugin folder.If we look in the folder:

gvSIG/extensiones/org.gvsig.coreplugin.app.mainplugin/

…of our installation of gvSIG, we will find a file “plugin-persistence.def” with the file´s definition “plugin-persistence.dat” stored in “HOME/gvSIG…”. For example, with “org.gvsig.coreplugin.app.mainplugin”, we will have something like:

<?xml version="1.0"?>
<definitions>
  <version>1.0.0</version>
  <classes>
    <class name="org.gvsig.coreplugin.app.mainplugin">
      <description>Persistence for the core plugin</description>
      <fields>

        <field name="showNotificationsInConsole" type="Boolean" defaultValue="false" mandatory="false">
          <description></description>
        </field>
        <field name="showNotificationsInStatusbar" type="Boolean" defaultValue="true" mandatory="false">
          <description></description>
        </field>

      </fields>
    </class>
  </classes>
</definitions>

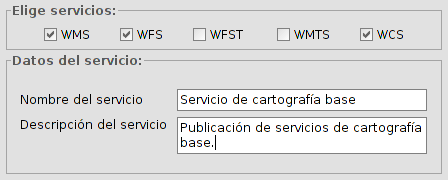
Here we have defined that in the preferences of the plugin there are two properties of type “boolean“, “showNotificationsInConsole” and “showNotificationsInStatusbar” and their default values are “false” and “true” respectively.

The first step to manage the preferences of our plugin will be to create this file with the definition of the attributes that we want to have in our preferences. For values “simples“, String, Integer, Double, Boolean… the definition is very simple, but we can store more complex data structures like “List“, “Map” o “Set“, and if we need we can define our own estructure. For now, I think the “simple” type taking a look at the files “plugin-persistence.def” is enough,which you can find in the installation of gvSIG. If you have any questions ask for the development list. If I have time and people think it would be interesting, I will prepare an article commenting in detail on all the possibilities we have to define our preference data in this file.

One important thing to note… it is very important that we put “<class name=” and you put the exact same name of the plugin if not, it won´t load with it.

Ok, I assume that you have created your file “plugin-persistence.def”, and it is ready for dropping in the installation folder of your plugin. Now what can I do with it?

It is very simple. We are going to see some code:

PluginsManager pluginsManager = PluginsLocator.getManager();
PluginServices plugin = pluginsManager.getPlugin(MyClaseExtension.class);
DynObject pluginProperties = plugin.getPluginProperties();

With these three lines, we would force the loading of the file, if it existed “plugin-persistence.dat”. If it didn´t exist, an empty new “structure” would be created with the definition of “plugin-persistence.def” and ne would be left in “pluginProperties” for us to acces. We could do:

  Boolean showNotificationsInStatusbar = (Boolean) pluginProperties.getDynValue("showNotificationsInStatusbar")

To access the “showNotificationsInStatusbar” property of our preferences file. Or if we wanted we could do:

  pluginProperties.setDynValue("showNotificationsInStatusbar", Boolean.TRUE);

If we wanted to assign a value to the property of our preferences. If we change the preference settings, you can force to save them at that moment with:

  pluginProperties.savePluginProperties()

Or simply, when gvSIGis closed, these are saved automatically.

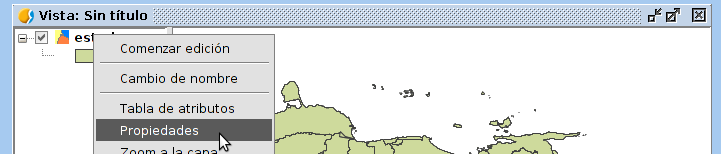
So it would be a very quick plan to can save or recover our plugin preferences. Now, what remains is to see how we can add a new entry to manage these preferences to the preferences dialogue of the application.

To create an entry in the preferences of gvSIG, we have to create a class that extends to the “AbstractPreferencePage” and fill in some methodology:

public class MyreferencesPage extends AbstractPreferencePage {

    private static final Logger logger = LoggerFactory.getLogger(MyPreferencesPage.class);

    public static final String ID = MyreferencesPage.class.getName();

    private MyPreferencesPanel preferences;
    private DynObject pluginProperties;
    private PluginServices plugin;

    public MyPreferencesPage() {
        initComponents();
    }

    private void initComponents() {
        I18nManager i18nManager = ToolsLocator.getI18nManager();
        PluginsManager pluginManager = PluginsLocator.getManager();
        this.plugin = pluginManager.getPlugin(this);
        this.pluginProperties = this.plugin.getPluginProperties();

        this.preferences = new MyPreferencesPanel();
        ...

        this.setLayout(new BorderLayout());
        this.add(this.preferences, BorderLayout.NORTH);
        initializeValues();
    }

    public void storeValues() throws StoreException {
    // We get the values from our pannel and
    // we save them in "pluginProperties"
    ...
        this.plugin.savePluginProperties();
    }

    public void setChangesApplied() {

    }

    public String getID() {
        return ID;
    }

    public String getTitle() {
        I18nManager i18nManager = ToolsLocator.getI18nManager();
        return i18nManager.getTranslation("Title of our page");

    }

    public JPanel getPanel() {
        return this;
    }

    public void initializeValues() {
    // We load our stored data in preferences,
    // "pluginProperties", at the controls of user interface

    ...
    Boolean showNotificationsInStatusbar = (Boolean) pluginProperties.getDynValue("showNotificationsInStatusbar");
    ...setSelected(showNotificationsInStatusbar.booleanValue());
    ...
    }

    public void initializeDefaults() {

    }

    public ImageIcon getIcon() {
        return IconThemeHelper.getImageIcon("my-preferences");
    }

    public boolean isValueChanged() {
      // If user has changed any value of our page
      // we will return "true" to recover them and
      // to be saved. In other case we will return "false"

      boolean changed = false;

      ...

      return changed;
    }

    public boolean isResizeable() {
      // The usual thing is to return true.
      // It indicates that the pannel will be at the dialog using a
      // layout that resizes it.
      return true;
    }

}

If we wanted that our preferences site to be “under” another one in the tree that appears on the preferences dialog, we would have to add to the construction of our class a call to “setParentID” indicating the ID of the page below the one we want to be our page. For example:

    public MyPreferencesPage() {
    setParentID(GeneralPage.id);
        initComponents();
    }

Our page would be located under “General” entry of the preferences dialog.

When we have created our class, we just have to register the gvSIG to be aware of it and it will be presented. To do this, in the “initialize” method of our extension, we can use something similar to these lines of code:

ExtensionPointManager extensionPoints =ToolsLocator.getExtensionPointManager();
ExtensionPoint ep = extensionPoints.add("AplicationPreferences", "");
ep.append("MyPage", "", new MyPreferencesPage());

Now, we just need to compile everything and see what happens.

I hope this has helped.

Bye¡¡

Posted in development, english, gvSIG Desktop | Comments Off on How to manage the preferences of a plugin in gvSIG 2.1

Generar etiquetas por escala (nueva extensión)

Ya hemos visto como crear leyendas por escalas con la nueva extensión “Complex Legend”. Teniendo ese mismo complemento instalado en nuestro gvSIG también podremos generar etiquetas en función de la escala a la que se encuentre nuestra Vista.

Vamos a repasar su funcionamiento

Como siempre, el primer paso será ir a las opciones de etiquetado: abrimos la ventana de propiedades de la capa sobre la que se aplicará el etiquetado (con botón derecho sobre el nombre de la capa en la Tabla de Contenidos de la Vista) y seleccionamos la pestaña ‘Etiquetado‘.

28_gvSIG_escalasLa definición de una etiqueta sensible a la escala se encuentra dentro del panel de “Etiquetas definidas por el usuario”.

29_gvSIG_escalasPor lo que respecta al panel asociado, apenas ha cambiado su estructura, por lo que se puede manejar de forma habitual; simplemente habrá que tener en cuenta que hay que tener seleccionada la operación “Definir diferentes clases de entidades y etiquetarlas de manera diferente” y la nueva opción de “Multiple label by scale del menú desplegable, tal y como se especifica en la imagen que sigue.

30_gvSIG_escalasUna vez marcada esta opción, se puede añadir una entrada que definirá la etiqueta a mostrar, pinchando directamente sobre el campo de “Expresión de etiqueta” que se ha añadido sobre la tabla.

La ventana que se muestra es muy similar a la que ya se conocía anteriormente, salvo que aparece una nueva pestaña en la parte superior que mostrará el formulario donde se indicará el rango de la escala sobre la que estará visible la etiqueta.

31_gvSIG_escalasUna funcionalidad de lo más interesante, ¿verdad?

Posted in gvSIG Desktop, spanish | Tagged , , , | 5 Comments

Verso gvSIG 2.2: Estensione di pubblicazione

Questa estensione diventerà uno strumento indispensabile per gli utenti che hanno bisogno di pubblicare le proprie mappe utilizzando applicazioni MapServer, MapProxy e TinyOWS.

L’obbiettivo è quello di consentire la pubblicazione automatica dei servizi cartografici, cercando di ottenere risultati il ​​più possibile fedeli al lavoro originale che abbiamo realizzato in gvSIG 2.1.

L’estensione si trova sotto il nome di ‘org.gvsig.publish‘, e può essere installato attraverso il ‘Gestore delle estensioni’ selezionando installazione da URL e selezionando dalla lista il repository di test (Testing gvSIG repository – http://downloads.gvsig.org/download/gvsig-desktop-testing/).

Una volta installato avrete accesso alle funzionalità di pubblicazione tramite Vista> Esporta> Esporta vista a mapfile, oppure tramite il pulsante corrispondente.

Vediamo ora una breve guida sul funzionamento di questa applicazione:

Selezione della cartella di lavoro locale

Per operare più agevolmente, l’estensione richiede che si definisca una cartella in locale per memorizzare e creare l’intera struttura del progetto.

Si può lavorare su una nuova directory vuota (creata ex novo o già esistente) oppure su di una su cui abbiamo già lavorato in precedenza (per unire più lavori in un unico progetto).

Opzioni avanzate: Selezione dei servizi

Se attiviamo la casella di controllo ‘avanzate’ è possibile accedere ai servizi disponibili attraverso la scheda ‘servizi’ dove è possibile selezionare i servizi desiderati eseguendo la pubblicazione una volta sola.

Ogni servizio genererà un sottocartella nella directory di progetto in cui saranno creati i file necessari per il corretto funzionamento del servizio desiderato.

Inoltre, è possibile definire il nome con cui il servizio sarà visualizzata dai clienti e la relativa descrizione.

01_gvSIG_Publish

Creazione del progetto

Se la cartella locale di destinazione in cui memorizzare il progetto non è vuota, l’applicazione chiederà di scegliere tra la sovrascrivere, aggiungere o cancellare.

  • Sovrascrivi: crea tutti i file necessari per il progetto, potendo modificare il contenuto dei precedenti file se richiesto.
  • Inserisci: se si desidera aggiungere ulteriori informazioni a un progetto esistente, senza perdere le informazioni precedenti.

Questo è giusto un assaggio, nei post successivi vedremo le possibilità fornite da questo plugin per l’editing manuale di attributi specifici e come caricare il progetto sul server. Per non parlare delle possibilità di combinazione con un altro plugin, che speriamo di pubblicare presto, in grado di generare legende ed etichette in funzione della scala …

Posted in gvSIG Desktop, Italian, testing | Tagged , , , , | 2 Comments

gvSIG 2.1: da Excel a gvSIG

Durante l’ultimo Summer Google Code è stato sviluppato un nuovo plugin per gvSIG 2.1. Questo plugin permette di caricare i dati precedentemente salvati in formato Microsoft Excel.

Questo plug-in sarà incluso di default nella prossima generazione di gvSIG, ma è possibile testarlo fin da subito.

E’ possibile installare il plug-in attraverso il Gestore delle Estensioni selezionando l’opzione “Installazione standard”, che accede ai plug-in di base già inclusi nella distribuzione gvSIG; sia attraverso il “Installazione da URL”, accedendo anche ai plug-in disponibili sul repository remoto di gvSIG.
Possiamo anche installare alcun plug-in dalla opzione “Installazione da file”; questa opzione può essere molto utile per testare le estensioni che non sono né nella distribuzione standard né sul repository remoto.
Diamo uno sguardo rapido al video in cui si mostra come installare il plug-in di Excel, il file può essere scaricato da qui.

Una volta installato, è necessario riavviare gvSIG e verificare che l’aggiunta di una nuova tabella in formato Excel sia supportata.

Attraverso questo plug-in è possibile:

  • Caricare fogli di calcolo Excel come tabelle
  • Caricare fogli di calcolo Excel come layer

In gvSIG possiamo definire le seguenti proprietà del file Excel da aggiungere.

Le proprietà principali sono:

  • File: percorso del file
  • Locale: elenco a discesa per scegliere la configurazione che definisce il set di caratteri usati come separatori per migliaia e decimali.
  • Foglio da aggiungere: elenco a discesa per selezionare il file di Excel da caricare come tabella.
  • Usa prima riga come intestazione: Se questa opzione è attivata, la prima riga verrà usata per definire i nomi dei campi.
  • CRS: se il foglio di lavoro di Excel contiene dei campi coordinate, questo parametro consente di specificarne il sistema di riferimento.
  • Punti (X, Y, Z): campi che contenengono le coordinate. Nel caso in cui foglio Excel contenga coordinate, almeno i campi X e Y devono essere indicati.

Possiamo anche definire altre proprietà (nella scheda “Avanzate”) come, ad esempio, forzare il tipo di campo quando si carica la tabella. Nel manuale del plug-in si possono trovare delle informazioni più dettagliate.
Come detto, in gvSIG 2.1, è possibile aggiungere un foglio Excel e, in presenza di coordinate, lo possiamo aggiungere direttamente come layer.

Vediamo un esempio in cui si aggiunge un foglio di calcolo Excel come tabella contenente l’età media della popolazione africana. In questo esempio abbiamo specificato che la prima riga contiene i nomi dei campi.

Nel secondo esempio si vede come aggiungere un foglio di calcolo di Excel, che ha i campi con le coordinate, direttamente come un layer. In questo caso definiamo il CRS ed i nomi dei campi contenenti le coordinate x ed y, denominati “X” e “Y”.

Posted in gvSIG Desktop, Italian | Tagged , , | 1 Comment

On the road to gvSIG 2.2: Publishing extension

This extension will become an indispensable tool for users who need to publish their maps using MapServer, MapProxy and TinyOWS.

Its aim is to enable a process automation for the maps publishing services , trying to obtain results as true as possible to the original work made in our gvSIG 2.1

The extension can be found with the name ‘org.gvsig.publish‘, and it can be installed from the ‘Plugin Manager’, selecting the URL installation and in the drop-down of (Testing gvSIG repository – http://downloads.gvsig.org/download/gvsig-desktop-testing/).

Once installed, we will have access to the publishing functionality either through the menu View>Export>Export view to mapfile, either via the button appropriate.

Let´s see with a quick guide, how this extension works:

Selection of the local work directory

In order to operate more comfortably, this extension requires that you define a local folder on your computer to store and create the whole project structure.

It can be a new directory (created if doesn´t exist), empty or one which already has previously worked (to join several works in one only project).

Advanced options: Services selection

If we check the ‘Advanced options’, we will be able to access to the available services through the ‘Service’ tab, in which we can mark as many as we need, performing the publishing once.

Each service will create a subfolder with its name in the project directory and inside of the subfolder, all the files needed for that concrete service will be stored.

Also, we have offered the possibility to indicate the name under which the service will be displayed to customers and the description in the same form.

01_gvSIG_Publish

Project creation

If the final directory where the project is going to be stored is not empty, the app will ask us to choose between overwrite, add or cancel.

  • Overwrite: It will create all the files needed for the project, being able to change the previous files content if it is required.

  • Add: if we want to add more information to a project without losing any previous information.

In following posts, we will carry on with more possibilities of this new plugin, such as the manual edition of specific attributes and the upload of the project to the server. There are, as well, good possibilities with its combination with other plugin (which we hope to release soon) allowing to generate legends and label by scales.

Posted in english, gvSIG Desktop, testing | Tagged , , , , , , | 5 Comments

gvSIG 2.1: Trascinare i layers dall’esplora risorse

In gvSIG 2.1 troviamo un altro piccolo miglioramento, ma che porta molti vantaggi per gli utenti. E ‘ la possibilità di trascinare i layer dall’esplora risorse all’interno nella nostra Vista per aggiungervi automaticamente il layer.

Nel video possiamo vedere questa procedura:

Posted in gvSIG Desktop, Italian | Tagged | 1 Comment

Etichettatura avanzata in gvSIG 2.1

Una delle caratteristiche che si possono trovare in gvSIG 2.1 è l’etichettatura avanzata che comprende molte opzioni e strumenti per personalizzare le etichette in base alle esigenze dell’utente. L’etichettatura avanzata è stato migrata da gvSIG 1.x a gvSIG 2.1 , mantenendo tutte le opzioni di personalizzazione esistenti ed aggiungendo alcune opzioni fra le più richieste dalla comunità degli utenti come, ad esempio, l’opzione alone.

Di seguito sono disponibili due video che mostrano alcune ( fra le tante ) opzioni di etichettatura.

Nel secondo video si mostra come visualizzare le etichette unicamente per gli elementi selezionati.

Posted in gvSIG Desktop, Italian | Tagged , , , | 1 Comment

gvSIG 2.1: Editazione alfanumerica nella Vista

Una delle nuove funzioni incluse in gvSIG 2.1, grazie al contributo della società brasiliana GAUSS geotecnologia e engenharia, è uno strumento tanto facile quanto utile: un editor alfanumerico che permette di modificare gli attributi di qualsiasi elemento di un layer senza doverne aprire la tabella.

Il suo funzionamento è simile allo strumento “Informazioni”, ma con in più la possibilità di modificare gli attributi dell’elemento selezionato. In questo modo le operazioni di modifica risultano decisamente velocizzate.

Di seguito è possibile vedere un video su questo nuovo ed utile strumento :

Posted in gvSIG Desktop, Italian | Tagged , , | 1 Comment

Verso gvSIG 2.2

road

Dopo l’uscita di gvSIG 2.1, inizia il cammino verso gvSIG 2.2, durante il quali chiediamo la vostra collaborazione, sia per la fase di test che per ogni altro possibile contributo sia tecnico che economico.

Eravamo in attesa del rilascio di gvSIG 2.1 per stabilire un regolare programma di pubblicazione delle nuove versioni di gvSIG. La nostra intenzione, ispirandosi a progetti come Ubuntu, è quello di pubblicare due versioni ogni anno, verso maggio e dicembre, quest’ultima in concomitanza con la Conferenza Internazionale gvSIG a Valenzia.

In questo modo sia i gruppi di sviluppo che le varie organizzazioni che utilizzano gvSIG potranno pianificare le loro attività sia per quanto riguarda l’invio di contributi tecnici che per l’aggiornamento delle versioni.

gvSIG 2.2 dovrebbe essere quindi disponibile in maggio.

Cosa abbiamo in programma per questa nuova versione? A livello di sviluppo non ci saranno grandi cambiamenti nel nucleo, essendo la 2.2 una versione che permetterà di continuare il debug oltre ad aggiungere nuove estensioni di cui stiamo ultimando lo sviluppo.

Nelle prossime settimane verranno rilasciate nuove estensioni che dovrebbero essere incluse nella prossima versione di gvSIG (e si potranno utilizzare anche su gvSIG 2.1) per permettere agli utenti di aiutarci nella fase di test. Segui le notizie che verranno periodicamente pubblicate visto che ci saranno novità veramente interessanti.

Posted in gvSIG Desktop, Italian, technical collaborations, testing | Tagged , | 1 Comment

Nueva extensión: Generar leyendas por escala

Seguimos avanzando hacia gvSIG 2.2 con un nuevo complemento que permite trabajar con leyendas por escala (también con etiquetados, pero eso lo veremos en otro post).

El plugin se denomina Complex Legend extension  y, como es habitual, podemos instalarlo a través del administrador de complementos, indicando instalación desde URL y en el desplegable el repositorio de testing (Testing gvSIG repository – http://downloads.gvsig.org/download/gvsig-desktop-testing/).

Veamos como funciona…

Realizamos el proceso habitual para cambiar la Simbología de una capa: abrimos la ventana de “Propiedades” de la capa sobre la que se aplicará la leyenda (con botón derecho sobre el nombre de la capa en la tabla de contenidos de la vista) y seleccionamos la pestaña ‘Simbología’.

23_gvSIG_escalasDentro de las distintas opciones de leyendas disponibles veremos que se ha añadido una nueva: “Símbolo complejo”. La seleccionamos.

24_gvSIG_escalasA continuación se presentará un formulario en el que se comenzarán a definir los rangos de escalas con los que se trabajará y los tipos de leyenda a utilizar en cada tramo.

Podemos incluir nuevos rangos a través del botón ‘añadir‘ (representado con una cruz verde) y eliminar el seleccionado mediante el botón ‘borrar‘ (aspa roja).

25_gvSIG_escalasEn función de los datos introducidos se irá completando el combo y se rellenará el panel inferior con el formulario necesario para rellenar los parámetros característicos de la leyenda.

26_gvSIG_escalasDespués de esto, sólo queda repetir esta operación tantas veces como rangos se deseen definir para la capa.

27_gvSIG_escalasPulsamos aceptar y vamos a comprobar el resultado. Si todo ha ido bien, la capa irá cambiando la leyenda de forma dinámica en función de la escala a la que se encuentre la vista.

Otra utilidad interesante es que en los rangos no cubiertos por la leyenda no se mostrará ninguna información, es decir, podemos hacer que la capa esté “invisible” para escalas no definidas.

En un próximo post veremos como generar etiquetas por escala.

Posted in gvSIG Desktop, spanish, testing | Tagged , , , | 6 Comments