
We follow with this mini-course about the introduction to Geographic Information Systems with Game of Thrones.Today we are going to see how to open the attribute table of a layer.
Firstly we are going to open our project, that we saved when finishing the first exercise. Then we are going to add a new layer (such as we saw in that first exercise), called “Political”, that has the different kingdoms of the “Westeros” continent, known as “Seven kingdoms” too. The new layer has a legend that shows it without fill and with a border line in black colour and thicker.
To see the alphanumeric information that is contained in this layer we press the name of the layer with the secondary button at the Table of Contents. A menu will be opened where we have to select the “Attribute table” option.

The attribute table shows us the information about the political division of the continent, with the name of the different territories and their governing houses:
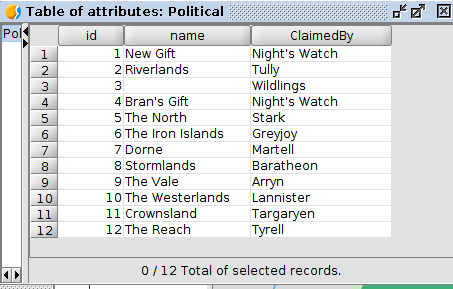
The regions are Dorne, Stormlands, The Reach, Crownsland, The Westerlands, The Vale and Riverlands. They are completed with: The Iron Islands, The North, New Gift and Bran’s Gift and the area beyond the wall, called Wildlings. In another post we will see how to edit this table and add more information.
Something important that we have to know is that the attribute table and the layer with graphical elements are two different ways to see the same information. Each row of the table is a different geometry (line, point or polygon depending on the layer). A very graphical way to see it is selecting an element in the attribute table; for that we have to press the row that we want to select. The corresponding geometry will be selected automatically.
For example if I select the row of The North region, I will get this graphical selection:

You can select the different rows of the Table and see its correspondence in the cartography. And if you want to remove any selection you have to use the “Clear” option of the “Selection” menu or its corresponding button:
 It’s easy, isn’t it? Don’t forget to save your project and we will continue learning at the next post…


This is so cool! Love it!
Pingback: Learning GIS with Game of Thrones (III): Navigation tools | gvSIG blog
Pingback: Learning GIS with Game of Thrones (IV): Selecting tools | gvSIG blog
Pingback: Learning GIS with Game of Thrones (V): Editing tables | gvSIG blog
Pingback: Learning GIS with Game of Thrones (VII): Adding coordinates to a Table | gvSIG blog